Preparation for the custom Gallery Screen
Atom (or other editors are also possible): Download Atom here
(If you want to choose to show only a single character CG per page, like this tutorial, you also need several pictures to show the name of each character (see how many characters you have)
 |
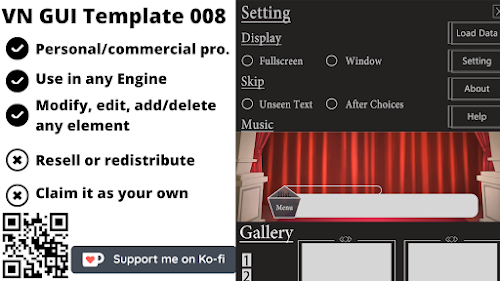
| This is what my gallery will look like in the end |
Custom Gallery Screen
First you need to create a new rpy file I recommend you to use gallery but if you want to call it another name you can also call it another ername
init python:
g = Gallery()
Then write the following 3 strings of codes, according to how many CG / how many pictures you want to display later
g.button(" you can customize this name ")
Suppose you have 9 pictures, then you have to write 9 times the codes above
When each picture is defined then add the following codes:
screen (your screen name ):
tag menu
add "gui/( the background of the Gallery ).png"
grid 3 3: #( 3 rows and 3 verticals = like 9 squares )
spacing 25 #( the distance of each different grid )
add g.make_button("The name you took before")," The path to your saved image ", locked = "The path to the image displayed when the image is not unlocked")
 |
When the spacing is 0, the screen looks like this, so I recommend setting the spacing to more than 10
 |
It doesn't look great if it's too wide, so it's better to be under 30 |
There are 9 images so the above code has to be written 9 times
Stringing all the code together would look like this:
init python:
g = Gallery()
g.button("intro")
g.condition("persistent.intro")
g.image("CG/1.png")
g.button("a2")
g.condition("persistent.a2")
g.image("CG/2.png")
g.button("a3")
g.condition("persistent.a3")
g.image("CG/3.png")
g.button("a4")
g.condition("persistent.a4")
g.image("CG/4.png")
g.button("a5")
g.condition("persistent.a5")
g.image("CG/5.png")
g.button("a6")
g.condition("persistent.a6")
g.image("CG/6.png")
g.button("a7")
g.condition("persistent.a7")
g.image("CG/7.png")
g.button("a8")
g.condition("persistent.a8")
g.image("CG/8.png")
g.button("a9")
g.condition("persistent.a9")
g.image("CG/9.png")
screen gallery_general:
tag menu
add "gui/gallery.png"
hbox:
yalign 0.5
xalign 0.5
#(center the screen)
use gallery_navigation
grid 3 3:
spacing 25
add g.make_button("intro","CG/intro.png", locked = "CG/locked.png")
add g.make_button("a2","CG/2.png", locked = "CG/locked.png")
add g.make_button("a3","CG/3.png", locked = "CG/locked.png")
add g.make_button("a4","CG/4.png", locked = "CG/locked.png")
add g.make_button("a5","CG/5.png", locked = "CG/locked.png")
add g.make_button("a6","CG/6.png", locked = "CG/locked.png")
add g.make_button("a7","CG/7.png", locked = "CG/locked.png")
add g.make_button("a8","CG/8.png", locked = "CG/locked.png")
add g.make_button("a9","CG/9.png", locked = "CG/locked.png")
This completes my Gallery Screen, and other Gallery screens can be created according to the same code
After you finish each character or each chapter's Gallery screen you can make a screen to put each screen together (like the picture at the beginning of this post)
So you need the following code (you can change the code according to your name/other path)
screen gallery:
vbox:
spacing 25
xoffset -100
#(to make the screen appear in the correct position)
imagebutton auto "gui/button/general_%s.png" action ShowMenu("gallery_general")
imagebutton auto "gui/button/background_%s.png" action ShowMenu("gallery_bg")
imagebutton auto "gui/button/len_%s.png" action ShowMenu("gallery_len")
imagebutton auto "gui/button/ray_%s.png" action ShowMenu("gallery_ray")
imagebutton auto "gui/button/gallery_close_%s.png" action Return() yoffset -350 xoffset 1300
Imagebutton - Use of Auto
So you have to prepare 3 images for each imagebutton
Other related links:
Click here to read the 4th article (Custom Renpy Confirm Screen)
Click here to read the 3th article (Custom Renpy Preferences Screen)
Click here to read the 2nd article (Custom Renpy GUI)
Click here to read the 1st article (Basic Renpy Code Things)
The material used to create this tutorial is free material from 空 想 曲 線
 Reviewed by NingNing
on
July 18, 2021
Rating:
Reviewed by NingNing
on
July 18, 2021
Rating:

No comments:
Leave A Message!