Here is a little tutorial of basic GUI Customization
First renpy tutorial is here
Things you need to prepared :
Renpy itself - Renpy download link
Custom Renpy Title / Cover Screen
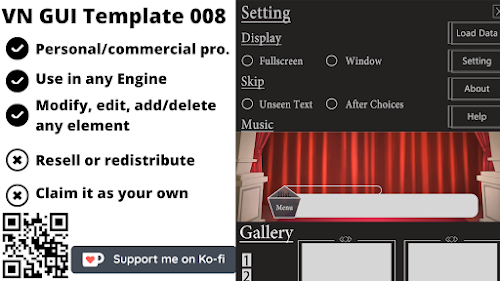
To change the GUI or UI first you need to use screen.rpy and gui.rpy so open them first
You can use crtl + F to find Main Menu screen
You can choose to use Navigation's screen or you can also use imagemap to create new screen
Use of Imagemap:
First, prepare 1 picture for ground / 1 for idle / 1 for hover
ground: used when nothing (to be) is selected
idle: Shows what objects that can be selected look like before they are selected
hover: Shows what an object that can be selected will look like when it is selected
Find the corresponding areas- hotspot - when the mouse is over, there will be a range of responses, it consists of 4 numbers, You can for example use this software RenPy HotSpot Tool to find the hotspot
How to use this software you can check out this video
imagemap's codes can look like this :
( You can copy the code below under your screen main menu )
    imagemap:
        ground "gui/menu_idle.png"
        idle "gui/menu_idle.png"
        hover "gui/menu_hover.png"

        hotspot (794, 62, 287, 67) action Start() #New Game
        hotspot (800, 174, 241, 60) action ShowMenu("load") #Data Load
        hotspot (780, 271, 262, 60) action ShowMenu("preferences") #Preferences / setting screen
        hotspot (992, 385, 194, 57) action jump("gallery") #Gallery
        hotspot (815, 475, 146, 64) action Quit(confirm=False) #Exit
↓ ↓ It is the image I used ↓ ↓

Custom Renpy Navigation screen
1. If you don't want to use pictures, you just use text to display
Change displayed Text
To change the text on a button like for example this striing:
textbutton _("History") action ShowMenu("history")
To change the text of textbutton _("History") you need to change the text between"__"
For example:
change from
textbutton _("Preferences") action ShowMenu("preferences")to
textbutton _("Setting") action ShowMenu("preferences")


Change the position where the character name is displayed
(So the player will see Setting instead of Preferences)
2. You can use it if you want to use a picture - Imagebutton
Like this: imagebutton auto "gui/pref_%s.png" action ShowMenu("preferences")
or if you only have idle and hover images to display
You can use the code below:
imagebutton idle "gui/pref_idle.png" hover"gui/pref_hover.png" action ShowMenu("preferences")
Change the Position of a text
add xpos (horizontal position) and ypos (vertical position) after textbutton_("options")
↓ For example ↓
textbutton _("選項") xpos 100 ypos 10 action ShowMenu("preferences")
Custom Renpy Mouse Cursor
Maybe you want to display your own mouse ( cursor )
You only need to add the string below in screen.rpy :
define config.mouse = {"default":[ ("The path of your image", 1, 1) ] }
Just add the code above that mark with blue color
Custom Renpy Textbox
Change the display of dialogue text
Open gui.rpy
Find gui.dialogue_xpos and gui.dialogue_ypos
After changing the following numbers, you can change the position where the text is displayed to match your own Box pull.
Change where the dialog box is displayed
If you want to make the dialog box a little above or below
You have to find gui.textbox_yalign in gui.rpy and change the number behind it
Find gui.name_xpos and gui.name_ypos in gui.rpy and change the numbers behind
Basically, all settings about the dialog box/name box are under Dialogue, so you can also check the Dialogue and see the code below
Other related Link :
Click here to read the 5th article (Custom Renpy Gallery screen)
Click here to read the 4th article (Custom Renpy Confirm Screen)
Click here to read the 3th article (Custom Renpy Preferences Screen)
Click here to read the 2nd article (Custom Renpy GUI)
Click here to read the 1st article (Basic Renpy Code Things)
【Renpy Tutorial #02】 Custom Renpy GUI
 Reviewed by NingNing
on
July 16, 2021
Rating:
Reviewed by NingNing
on
July 16, 2021
Rating:
Reviewed by NingNing
on
July 16, 2021
Rating:

No comments:
Leave A Message!