This is a Basic Renpy Tutorial - This Tutorial contains the following things:
- Add Character
- Change Character Expression
- Scene Background
- Show Text
- Choice (Story Branch)
- Play Music and Sound
- Disappear an image
- Transition Affect
Basic Things:
1. Add Character
- define Character ID = Character('Name of yout Character')
- Example: define e = Character('Eileen', color="#000000")
e - After that, as long as you type an e in front of the sentence, it will automatically be displayed as Eileen ((In the game/ in the script it is still e
Eileen - the name of e , if you want to change the name of a character later, it is very convenient to pull it, just change the text after Character(
For example, if you don’t want e to be called Eileen and want e to be Eva, you can change it to define e = Character('Eva', color="#000000")
color=What follows is the color code, as long as you change the number or letter behind, you can change the text displayed by a character (this is not necessary)
define Ning = Character ("Ning Ning", color="#ffffff")
In this way, a new character called Ning Ning is created.
color="#ffffff" The color representing this character is white (when the name is displayed)
After that, just type Ning in front of the sentence when Ning Ning speaks.
When you want to change Ning Ning's name, just change define sentence
define Ning = Character ("Ning Ning", color="#ffffff") just change the name in brackets is fine (no need to go to each line to change the name)
- Click here You can see the codes of various colors

 In this way, the correct picture will also be displayed.


 Change the color of a word in a sentence - {color=#D61E1E} Hello ! {/color}

add an image in the dialogue - {image= name of the image.png} Other special affect you can check them here

If you want to leave the picture, change hide lia to hide 01 and you can pull it (( 01 is the background image I use now (the red torii)
2. Added different emoticons for characters
- image (Character name + emoticon) = (Picture path)
Example : image eva cry = "images/evaCry.png"
image = So renpy know it is a image
eva cry = let renpy knows when to display this image (every time you type eva cry in the script)
"images/evaCry.png" = let Renpy knows where you stored this image
(In fact, the pictures in the images folder can be used directly by typing the name of the picture)
(( No need to define the picture in advance but you can do it
3. Display Background Image
You can use the background image stored in the project without defining the background in advance If you have put the background image you want to use in the renpy project, just type this when you want to use that image:
scene (the name of the picture)
Will show that picture is pulled in the background
renpy supports most picture formats (like png / jpg / WEB P) so most pictures can be displayed
Example:
Now there is a picture called 01 in my folder
I can directly write scene 01:
4. Displat Dialogue
Code:
Character name "You can enter the dialogue here"
Example:
e "Hello~"
Some special text show:
bold the text - {b} Hello ! {/b}
Make the text slanted - {i} Hello ! {/i}
underline the text- {u} Hello ! {/u}  Change the font of a word in a sentence - {font=IndieFlower-Regular.ttf} Hello ! {/font}
add an image in the dialogue - {image= name of the image.png}
For example:{image=flower.png}
It will looks like this :
5. Display Choice
menu:
"choice1"
jump (name of a label / a scene)
"choice 2"
jump (name of other label / another scene)
menu -let renpy knows here start a branch
"XXX" - the text is what the player can see (Text display in the game)
jump - when player choose a choice then the story will jump to the label you write here
For example if you write jump happy
then renpy will jumo to a label called happy
Example:
menu:
"Yes":
jump start
"No"
jump start
( because I dont have any other label so i let the 2 choice jump to start www )
See how will the code display in the game - Preview
( It repeats because both choice jump to start (beginning of the story) so the story will keep loop)
6. Add Music or Sound
- play music "path of your music"
- example: play music "audio/happy.mp3"
This will start to play happy.mp3 in the audio folder. If you don’t stop the music, the music will keep replay.
you can use this code to stop the music:
- stop music
You can use this code to play a sound:
- play sound "path of your sound"
It’s not the same as the music. The sound effect will stop once it’s played.
Audio files currently supported by renpy- Opus / Ogg/ MP3
7. Let the picture/character exit from the screen
- hide Object that need to be exited
You can use hide to leave pictures and characters with the name of the object to leave
like this:
hide lia
with zoomout
( Secretly add a transition effect www sneaking sneaking)
See the preview here for the effect presented :
If you want to leave the picture, change hide lia to hide 01 and you can pull it (( 01 is the background image I use now (the red torii)
8. Transition effects
I will list some more commonly used transition effects here:
- fade - Make the screen appear after being blacked out
- dissolve - Make the picture translucent, fade out and fade in
- move - Move screen/object
- zoomin/zoomout - i guess they are pretty easy to understand just read their name
Other different transition effects can be seen here - Official documentation
Example Transition effects:
show a at topleft:
offscreenleft
alpha 0.0
easein 1.0 xalign 0.5 yalign 0.0 alpha 1.0
e "Hello !"
hide ha
with dissolve
You can Click here to check/preview the effect
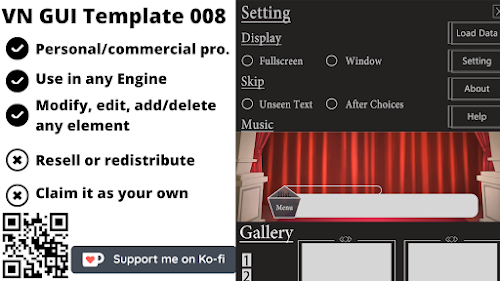
The black and white version of GUI Pack 003 is used for this tutorial. If you are interested, you can click here or here to buy this GUI
(There are free version and paid version)
【Renpy Tutorial #01】Basic Function
 Reviewed by NingNing
on
September 17, 2021
Rating:
Reviewed by NingNing
on
September 17, 2021
Rating:
Reviewed by NingNing
on
September 17, 2021
Rating:


No comments:
Leave A Message!