This is a simple tutorial on making a GUI Screen for your Rennpy Project If you didnt install Renpy - you can click here to download
The 2nd article can be found here ( Load, save screen/ textbox& namebox / Choice etc.)
So first you need to create a new renpy project
And the tutorial begin ~!
Step 1 - Title Screen
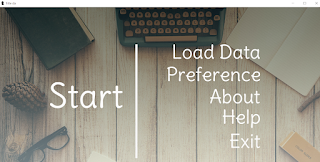
Make a Title / Cover for your Renpy Project - if you don't know how to make it / if you don't have any Idea, you can refer to the steps I made
1. Go to Pixabay or other similar sites
- Find a great picture ( the one that fits your project )
For me I will look for ticked image ( although all the images provided on Pixabay are free and commercially available, but the pictures are all uploaded by everyone. So somethimes we are not sure who owns the image, it is possible that the uploader uploaded someone else's photos )
2. Then open any image editing software
( for example Medibang, Krita or Photoshop... etc. )
Then just add some texts and make idle and hover version.
It takes about 5 minutes to make idle and hover ( for this one below)
Idle:
After you do them you can open your screen.rpy
You can use Crtl + F to find screen main_menu():
And Delete all the stuff below
add gui.main_menu_background## This empty frame darkens the main menu.
frame:
style "main_menu_frame"
## The use statement includes another screen inside this one. The actual
## contents of the main menu are in the navigation screen.
use navigation
if gui.show_name:
vbox:
style "main_menu_vbox"
text "[config.name!t]":
style "main_menu_title"
text "[config.version]":
style "main_menu_version"
Then type these code below screen main_meu:
imagemap:
ground "gui/idle.png"
idle "gui/idle.png"
hover "gui/hover.png"
( Texts between " " is the path where you store the title image because I put it directly in the gui, so there is only gui/idle. If you create a title or other folder and put the image there, then your path is will become "gui/title/idle.png" )
Then you can try to run your renpy Project
ground "gui/idle.png"
idle "gui/idle.png"
hover "gui/hover.png"
Add the following codes below the code above:
You will need to change the numbers between (xxx,xxx,xxx,xxx) after hotspot
hotspot is for the following numbers (xxx,xxx,xxx,xxx) (so renpy knows between (xxx,xxx,xxx,xxx) <-- this area is a button)
Action is to let Renpy know which screen is the button connected to
Like action ShowMenu("load" ) is linked to load screen
It would look like this if the positions were right Preview Here
If you don't want the text of your projects name on the cover / title
Then you can delete the following codes:
if gui.show_name:
vbox:
style "main_menu_vbox"
text "[config.name!t]":
style "main_menu_title"
text "[config.version]":
style "main_menu_version"
Step 2 - Preferences Screen
When you're done with your preferences images, go back to screen.rpy and delete the code under
screen preferences():
use game_menu(_("Preferences"), scroll="viewport"):
vbox:
hbox:
box_wrap True
if renpy.variant("pc") or renpy.variant("web"):
vbox:
style_prefix "radio"
label _("Display")
textbutton _("Window") action Preference("display", "window")
textbutton _("Fullscreen") action Preference("display", "fullscreen")
vbox:
style_prefix "radio"
label _("Rollback Side")
textbutton _("Disable") action Preference("rollback side", "disable")
textbutton _("Left") action Preference("rollback side", "left")
textbutton _("Right") action Preference("rollback side", "right")
vbox:
style_prefix "check"
label _("Skip")
textbutton _("Unseen Text") action Preference("skip", "toggle")
textbutton _("After Choices") action Preference("after choices", "toggle")
textbutton _("Transitions") action InvertSelected(Preference("transitions", "toggle"))
null height (4 * gui.pref_spacing)
hbox:
style_prefix "slider"
box_wrap True
vbox:
label _("Text Speed")
bar value Preference("text speed")
label _("Auto-Forward Time")
bar value Preference("auto-forward time")
vbox:
if config.has_music:
label _("Music Volume")
hbox:
bar value Preference("music volume")
if config.has_sound:
label _("Sound Volume")
hbox:
bar value Preference("sound volume")
if config.sample_sound:
textbutton _("Test") action Play("sound", config.sample_sound)
if config.has_voice:
label _("Voice Volume")
hbox:
bar value Preference("voice volume")
if config.sample_voice:
textbutton _("Test") action Play("voice", config.sample_voice)
if config.has_music or config.has_sound or config.has_voice:
null height gui.pref_spacing
textbutton _("Mute All"):
action Preference("all mute", "toggle")
style "mute_all_button"
Then add the following codes:
imagemap:
ground ' Path of your Image '
idle 'Path of your Image '
hover 'Path of your Image '
selected_idle 'Path of your Image '
selected_hover 'Path of your Image '
Then, like the Title screen, you can use the Image Location Picker to find the area corresponding to each button
After there is a corresponding position, put the number after the hotspot
For exmaple: hotspot (100, 200, 300, 400) action Preference('display', 'fullscreen')
In this way, renpy will know that if you click in this range (100, 200, 300, 400), the screen should turn into full screen
The following are the actions I often use:
Display options (full screen mode and window mode)
action Preference('display', 'fullscreen')
action Preference('display', 'window')
Skip options (Skip seen texts /Skip choices /Skip all)
action Preference('skip', 'seen')
action Preference("after choices", "toggle")
action Preference('skip', 'all')
For bar: ( Text Speed, Auto Speed, Music vol. and Sound vol.)
( Areas framed by black lines )
bar pos (XXX, XXX) value Preference("text speed")
bar pos (XXX, XXX) value Preference("sound volume")
bar pos (XXX, XXX) value Preference("music volume")
bar pos (XXX, XXX) value Preference("auto-forward time")
For more action you can check out here( Officail Documentation )
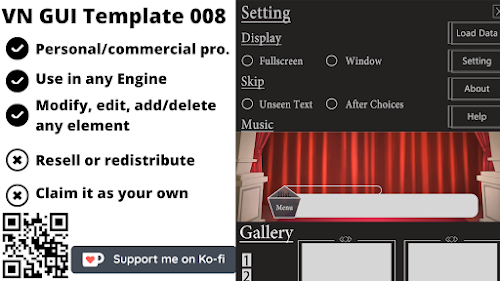
If the location/code is correct it will look like this - Preference Screen Preview
Step 3 - About & Help Screen
For example :
 Reviewed by NingNing
on
August 24, 2021
Rating:


Thanks
ReplyDelete