I actually made a PowerPoint for it but then I think the file is too big so ig its not nice to let ppl download such big file so I decide to put this in my blog and yes here~
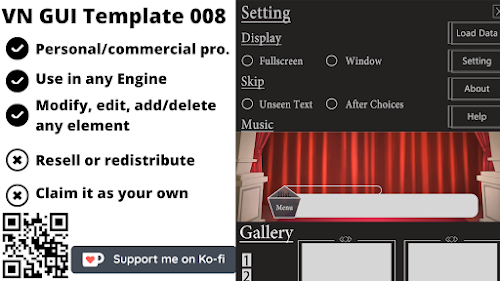
So Hello! First, thank you for buying this GUI Template o(^▽^)o or thinking about buying this GUI Pack
I made this ppt because i think maybe you will be a little bit confusing about the screens or the code so here it is just a little instruction
My English is very poor www so I wish you can understand what I mean and I will try my best to make it clear
1. Title Screen
What I thought when I was making this screen is to put the characters inside the slanted lines but you can do anything with this screen and you can also delete those lines if you don't want to do something like that
If you are using photoshop – you can use this tool - right side circle with the blue
Just drag and drop the image to photoshop then move the image to right position – click the tool I circle with blue line then you can crop the image then repeat this action then you will get a nice title screen
You can watch this video If you don't know how to do it
Another Title screen is this:it is inside the photoshop you can edit it with the same way I wrote above to crop the image to those blank space
(( I called them black line 2 and black line, Click on the front eye and you can make the line disappear

Next let me explain a little about the button on the title screen
I guess most Buttons like Start / Load / Setting or other button are common things so I don't really need to explain them what I want to focus now is Stats
My idea is to have a place to store and show player the Affection point of the character and the memories between the player and the character
I called it Stats but you can also change the name like idk maybe Character Room or Points... etc.
If you click on the button then you will see this screen
(( The image wont include in the Project, they are just here to preview So what I though about this screen is a list to show all Character and let player to choose
if you/player click on any character name or picture then it will enter this screen
A screen that shows the affection point of a character / memory, that the player collected and also his/her name and his / her character sprite
The Code I used here are inside the stats.rpy, you can modify the code there if you want to change something
((For the name I used name generator so there is no reference or smth like that If it happens to be same as someone else, it's just a coincidence
To increase or decrease the relationship point or memory you can use this code ↓↓
Example:
$p1_relation +=10
$p2_memo -=10
You can change the range to suit your project (( for example if the highest the player’s ability to develop a relationship with the character is 10, then you can set the value to 10
Another style for stats screen is this :
All the characters will appear in the list on the left side and the values will appear in the box on the right side
When the player clicks on the stats button from title screen, they will go directly to this screen and see the stats of the character.
To change / switch this 2 stats screen you can just change the code in screen.rpy
Example
hotspot (24, 608, 304, 101) action ShowMenu("stats")
You can replace stats with stats2 ((You can use find and replace function to do it quickly
If you dont want to put affection things here you can also use this screen to show some Information about this Character like this:
You can change the text in PSD file
- If you dont want to use this screen you can just delete the stats folder and every code in screen.rpy about stats - You can change the affection point to any other point / stats (ex. intelligent or idk power... etc.)
3. Stats Image
First to create this image:
You can use the file in psd
if you click idle or hover, you will see this so what you need to do is crop a character image to a circle and put the image above it ↓↓
Character name can be replaced with any other name~
How to create this screen:

1. To change the name - inside chara.rpy you can find this code ↓↓
textbutton _("{size=50}Your name{/size}") ypos 20 xpos 700 action ShowMenu("name1")
Replace your name with the real name of a character
2. To change this image ↓↓
You need to make the image you want first ((you can do it with the psd file replace this code - image "gui/stats/Morgana idle.png" ypos 20 xpos 20
with the right paths / image file
3. Change the person here
So I guess you need to resize the character first (( to fit in the screenthen you can replace this code below with your image file / other paths
image "gui/stats/Character Sprite.png" ypos 120 xpos -15
You can also change ypos and xpos if its needed
Now you cant see history button around dialogue box (cuz I didnt put it on the screen) But dont worry
To see the dialogue you can slide upwards your mouse so it will enter history screen


 Reviewed by NingNing
on
October 08, 2021
Rating:


No comments:
Leave A Message!